post

The Importance of a Chimney Inspection

Chimneys are often neglected, but a chimney inspection is essential for your home’s safety. Whether your home uses wood-burning fireplaces, gas fireplaces, or a heat pump, an annual Chimney Inspection Charleston SC is needed.Chimney Inspection

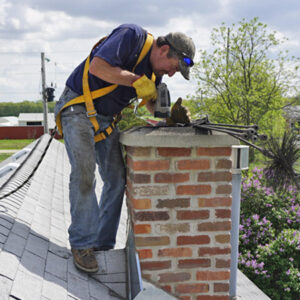
A Level 2 inspection examines all of the readily accessible parts of your chimney, including attics, crawl spaces, and basements. It also checks for proper clearances from combustibles in accessible locations.

The fires inside your fireplace or wood stove produce unwanted byproducts that make their way up the chimney, cooling and solidifying as they travel. These chemical byproducts are called creosote, and they are flammable and a leading cause of chimney fires. When they catch fire, they can spread to the roof and other parts of your house. They can also release toxic gases into your home. The National Fire Protection Association (NFPA) recommends having a chimney inspected and cleaned regularly to prevent dangerous creosote buildup.

Creosote is a black, tar-like substance that can be found in the flue of your chimney. It can appear in three different stages, and each one is more hazardous than the previous. The first stage is flaky and looks similar to soot. This stage can be easily removed during a routine chimney sweep using a basic chimney brush.

A second-degree creosote has a spongy texture and is harder to remove than the first. It can be removed with a special tool, but it’s still important to hire a professional. A chimney with a second-degree creosote buildup is more prone to chimney fires than one with a first-degree buildup because it restricts air flow and reduces draft.

Chimneys that are insulated can help prevent a large buildup of second-degree creosote by allowing the warm air to circulate better. A chimney with an oversized flue can also lead to the buildup of this material because it allows cooler air to pass up and around the fire instead of being vented out.

Third-degree creosote has the appearance of tar and is very thick. It requires a more concentrated effort to remove and is more likely to ignite when it comes into contact with hot chimney surfaces. A chimney that has reached this stage is a serious fire hazard and should be professionally cleaned by a CSIA-certified chimney sweep with specialized tools.

Putting off a chimney inspection and cleaning can lead to serious damage and put your family at risk. There are many signs that it’s time to schedule an appointment, including:

Damage

Over time, smoke and vapors from wood-burning fires will etch away at the brick and mortar of your chimney. This residue, called creosote, is incredibly flammable and can lead to chimney fires, carbon monoxide poisoning, and structural damage. When a CSIA-certified chimney sweep examines your chimney, they will look for any signs of creosote buildup and other issues that could increase the risk of fire or expose your home to harmful fumes.

A Level 1 inspection consists of a check of the readily accessible parts of your fireplace and chimney. This is the right choice if you plan to use your fireplace and chimney as you have in the past, if there’s been no change to your fuel type or to the shape or material of the flue (the space inside the chimney), and if it hasn’t been more than a year since your last chimney inspection.

Chimney fires can cause significant damage to the inside of your chimney and your house, but they’re not always easy to spot. In fact, a chimney fire can leave behind so much debris and heat that it can actually melt the mortar and drywall of your home. This is why it’s so important to have a professional chimney sweep inspect your chimney on a regular basis.

During a Level 2 chimney inspection, your inspector will also scan the internal surfaces of your chimney using a video camera to check for any signs of damage. A Level 2 inspection is usually required if you’ve made any changes to your fireplace or chimney, if you’re selling your home, or if the chimney was damaged by a natural disaster or operation malfunction.

If you’re unsure of when your chimney was last inspected, contact us today to schedule an appointment with a professional. Keeping up with regular chimney inspections can help you avoid costly repairs and save you money in the long run by preventing damage and making sure your fireplace is safe to use. In addition, many homeowner’s policies require that you get your chimney inspected on a regular basis to cover any damages caused by the use of a fireplace or wood-burning stove.

Debris

Over time, the flammable residue of wood-burning fires, known as creosote, builds up inside the chimney. This is one of the main reasons why it is important to have a professional CSIA-certified chimney sweep clean your chimney system regularly. When the creosote buildup gets too thick, it can lead to a chimney fire, which is dangerous and can cause combustible materials to erupt out of your fireplace. If a chimney fire does occur, it can cause serious damage and poisonous gases, such as carbon monoxide, to back up into your living spaces.

Debris falling from the fireplace is a common concern among homeowners, and it may cause some to worry that their chimney is in danger of collapsing. However, this debris does not always mean it is time for a chimney sweep or that there is any kind of structural problem. In many cases, the falling debris is simply parging, which is old, dry cement that was used to line the chimney when it was built, and it can break apart as the chimney ages.

Other types of debris that are often found in chimneys include bird droppings, squirrel nests, and a variety of leaves, branches, fruits, and nuts from nearby trees. In addition, animal debris can also be a problem, as squirrels, rats, mice, and birds love to build their nests in chimneys, and some of them even make their way down the flue. Unfortunately, these critters can end up getting stuck in the chimney and being unable to get out, which is a major safety concern.

If the chimney is full of debris, it can also obstruct drafting, which is another big problem. This means that smoke and dangerous exhaust fumes, such as carbon monoxide, are being sent into the living spaces rather than being vented outside. A chimney that is blocked with debris will also be a serious fire hazard and can put your family in danger.

Safety

Chimneys are made of porous masonry, which can expand and contract when exposed to heat and cold. When this happens, cracks can form that allow combustible materials like creosote and debris to escape the chimney. These substances can then burn, melt, or fall into a fireplace or home, posing fire and health hazards for your family. An inspection can identify these problems and repair them before they become serious.

A professional chimney sweep will examine the interior and exterior portions of your chimney as well as the flue, appliance connections, and combustible deposits. They’ll look for any signs of deterioration, damage, or blockages. For example, if you see small pieces of brick on the damper or fireplace floor, this is a sign that the chimney passageway is crumbling and needs repairs. This deterioration can also leave you open to dangerous exhaust leaks, which will enter your home through the firebox or flue.

Over time, creosote can degrade metal flue liners and crack the chimney itself. These problems can increase your risk of chimney fires and carbon monoxide poisoning. If left unchecked, they can be very costly to repair or replace.

Having a professional chimney inspection can help you reduce the risk of chimney fires and carbon monoxide poisoning, but there are other safety precautions you should take as well. Install smoke and carbon monoxide detectors on every level of your home, especially near bedrooms. Make sure that all doors and windows are open when burning a fire, and always use caution when using a power generator indoors or operating space heaters.

Regardless of how often you use your fireplace, having a chimney inspection at least once a year is essential. If you don’t know when your chimney was last inspected, or if it has never been inspected, now is the time to schedule one. It’s far safer than putting off an inspection until it’s too late. Remember, nearly 18,000 chimney fires are reported each year, and many of them could have been prevented with a routine chimney inspection and cleaning. So don’t delay; call today to schedule your chimney inspection.

post

Radiant Barrier Contractor – What You Need to Know Before Hiring a Radiant Barrier Contractor

Radiant Barrier Foil Houston helps save energy by stopping heat from entering the home during summer and retaining heat during winter. This will decrease your electric bills and help your HVAC system to work more efficiently.

Insulation Contractors
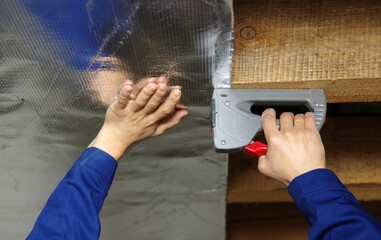
Radiation barrier foil is designed to reflect radiant heat while providing strength and durability. Unlike conventional insulation products, radiant barrier foil does not compress when handled.

Installation

Radiant barrier is a thin, reflective foil that’s installed in an attic to control radiant energy. It keeps the attic cooler, allowing your air conditioning to work less and save you money on electricity bills. If your home is consistently hot, despite keeping the thermostat set to a low temperature, or if you’re spending too much on your energy bills, then radiant barrier might be worth investing in.

Radiants barriers can be draped between the rafters in new construction or they can be installed in existing homes during an attic update. In a new house, installers will drape the foil product between the rafters before the roof deck goes on. They may also install it after the roof is finished by stapling it to the attic floor over the existing insulation. For either method, the foil surface should be facing downwards to minimize dust accumulation on the reflective side.

Before you begin installing a radiant barrier, check your attic for moisture and repair any leaks or damaged areas. Also, make sure to work in the attic only when temperatures are moderate and be very careful where you step. If you fall through the ceiling, it could be dangerous and costly to fix. It’s also a good idea to work with a friend, as it will go faster and help prevent accidents.

Once a radiant barrier has been installed, it will keep the attic cooler and allow your blown in insulation to perform better. It’s important that you pair it with a traditional insulation like cellulose, fiberglass or foam to get the most benefit.

If you don’t pair the radiant barrier with a traditional insulation, heat will transfer through the attic floor and into the living space. You can then use a dehumidifier to pull the moisture out of the air, which can lead to fungal growth and health problems.

It’s best to have a professional install your radiant barrier, but if you do decide to DIY, it’s important to follow the instructions and be careful. Especially when working with insulation, you must be very careful not to compress it or leave gaps. The gaps will allow moisture to enter and cause damage to the structure of your attic, which can be expensive to repair.

Repair

Radiant barriers consist of aluminum foil that’s applied to one or both sides of a number of substrate materials including plastic films, kraft paper, cardboard, and oriented strand board. They can also be combined with other types of thermal insulation materials. Some radiant barriers are fiber-reinforced to increase durability and ease of handling. When properly installed, a radiant barrier prevents heat from being transferred through the ceiling into occupied spaces below. It can also reduce cooling costs and may even allow for a smaller air conditioning unit to be used.

If you have a home in a hot climate or have attic ductwork, a radiant barrier can be an affordable energy efficiency solution. It keeps the attic cooler and can save up to 10% in cooling costs according to the Department of Energy. However, a radiant barrier is usually less effective in cool climates and should be complemented by additional thermal insulation.

When installing radiant barrier, it’s important to make sure the foil surface faces downward so that dust doesn’t accumulate on it over time. Additionally, it’s important to check for any signs of moisture in the attic and eliminate it before applying the radiant barrier. Finally, it’s important to note that radiant barrier installation is a multi-person project. If you’re installing the radiant barrier over existing insulation, it’s important to pull the sheets taut after stapling them so that they don’t sag between rafters.

While many consumers are misled into thinking that radiant barriers with more layers are better than others, the truth is that it’s not the number of layers that makes a radiant barrier superior. The quality of a radiant barrier depends on its strength, flammability, water vapor permeability, and other qualities. Always look for a radiant barrier with current ASTM testing results to ensure that you’re getting the best product available.

A radiant barrier can also improve the performance of your existing attic insulation. This is particularly true in a home with an open-ridge attic. The radiant barrier will help to reflect the sun’s heat back into space, reducing the temperature of the roof cavity interior from 160°F to a more comfortable 100°F and saving you money on your energy bills.

Maintenance

If you want to save money on energy bills by keeping your home cooler and cutting back on air conditioner usage, a radiant barrier may be the answer. However, there are a few things you need to keep in mind before deciding on radiant barrier installation.

First, consider the climate in your area and how you use your home. An attic radiant barrier will reduce cooling costs by deflecting the sun’s heat rays rather than absorbing them as typical thermal insulation does.

Unlike traditional fiberglass batt insulation, radiant barriers are typically made of foil. This makes them more effective at reflecting solar rays than traditional foam. However, they do not provide the same R-values that standard insulation does. Foil radiant barriers are available as sheets that can be slid under the roof sheathing or placed on top of existing insulation. They can also be spray-applied, which is sometimes the preferred method when working with older buildings.

Before installing a radiant barrier, be sure to clean the area and check for signs of moisture. Moisture can cause a ceiling to leak and degrade the effectiveness of the insulation. It is also important to make sure that your attic ventilation is adequate. Insufficient ventilation can result in moisture build-up that can lead to fungal growth and lower the efficiency of your attic insulation.

In addition, be sure to check your attic for clogged ridge vents, gable vents and soffit vents. These can restrict the flow of air through your attic space and limit the benefits of a radiant barrier.

Another consideration is the shape of your attic space. If your attic floor is used for storage, radiant barriers can become susceptible to dust accumulation and are less effective than if they are slid under the rafters. Finally, it’s a good idea to have any recessed lights or other items that are located above your attic installed before you install a radiant barrier.

If you’re thinking about radiant barrier installation, contact the Temple professionals at FIX IT! We’ll inspect your attic space and give you options to help you reduce your energy bills. We can also provide duct cleaning and blow-in insulation for additional energy savings.

Replacement

The process for incorporating radiant barriers into a new home differs slightly from the process of replacing older insulation, but either option can help homeowners save money on their energy bills. In a new home, an installer typically drapes a rolled foil radiant barrier with its reflective faces down between the roof rafters before applying the attic floor sheathing. This helps to minimize the amount of dust that will settle on the reflective surfaces. For existing homes, contractors can install a radiant barrier by stapling the material to the bottom of the rafters from the inside of the attic or by placing it on top of the attic floor insulation.

Radiant barriers are primarily effective at reducing summer heat gain, but can also reduce heating costs during the winter. They are designed to reflect radiant energy away from the attic and into the air space between the rafters, but they don’t have the R-value of traditional thermal insulation materials.

To be effective, a radiant barrier must have its reflective surface facing an open air space with a substantial temperature difference between the roof deck and shingles. It must also be perpendicular to the sun’s radiant energy and strike it at a relatively low angle in order to effectively reduce solar heat. When it’s sandwiched between shingles and the roof sheathing without this air gap, it becomes a heat conductor rather than a radiant barrier and will actually cause cooling costs to increase.

When comparing radiant barriers, look for products with the highest possible fire ratings (Class A or Class 1) and a high reflectivity rating. The reflected energy should be 95-97%, but the emittance should be no higher than 3-5%. Also, be sure to purchase a breathable radiant barrier. A breathable radiant barrier has a middle layer of tightly woven fabric that makes the product stronger and allows moisture vapor to pass through.

For best results, combine radiant barriers with other types of attic insulation to achieve the desired R-value for your home. Radiant plywood barriers keep the attic cooler before the heat reaches your blown-in insulation on the attic floor, which can help to significantly reduce cooling costs in hotter climates.